


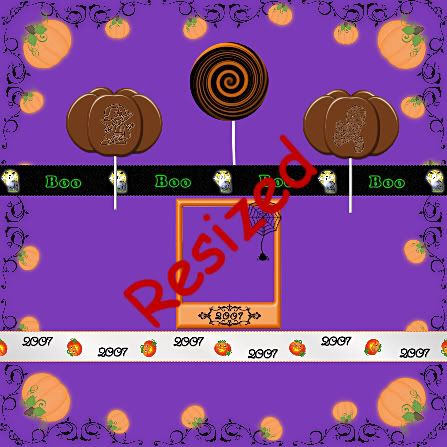
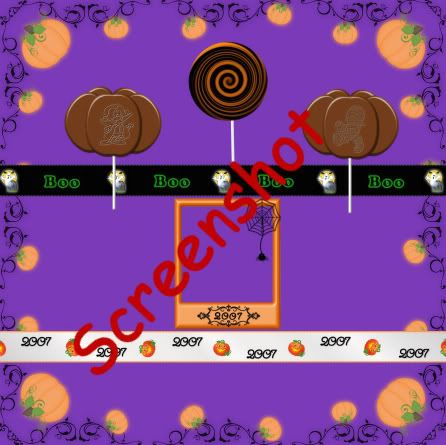
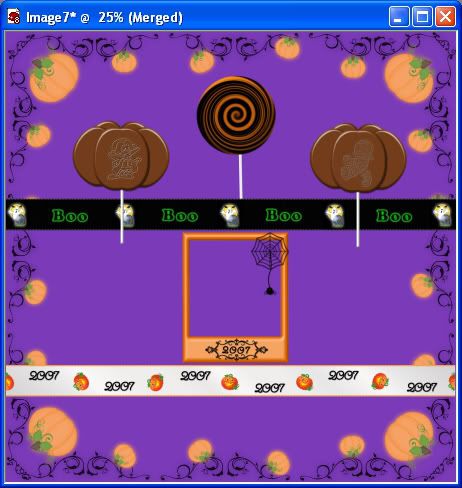
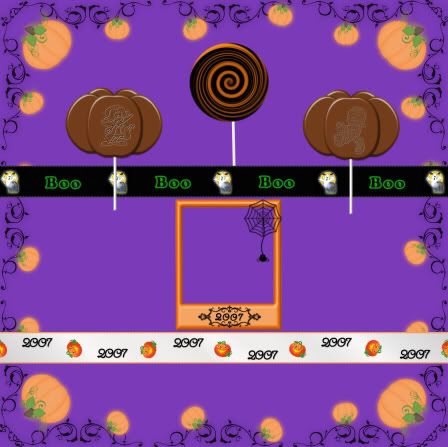
In the above first picture, I've resized my layout using the resize option in PSP. The second picture is using the screenshot option in PSP, which come out much clearer and without distorting the pixels. I use this method when I post pictures for my tutorials, or a preview of a freebie scrap kit on my blog. It comes out very clear and without any of the fuzziness that you get if you try and resize a layout instead of just using a screenshot.
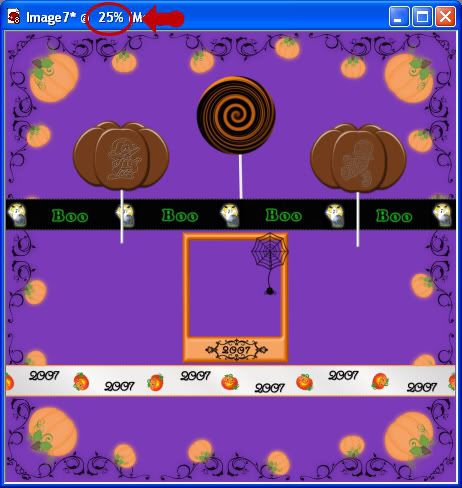
My full size layouts are usually 1800 pixels by 1800 pixels, so open up a full size background paper that you want for your preview picture of your layout, and arrange the items on the background as you would like them. I'm using parts of my freebie halloween 2007 kit for this. When you are satisfied with what you have, click inside your background paper to make sure it is active, and using your mouse scroll button, scroll downwards to decrease the appearance size of your image. I'm going to decrease it to 25%. See picture below.
Now here comes the tricky part. In order for you to take a screenshot, you need to have paint shop pro open twice. One PSP application to take the screenshot, and your main PSP application in which you are working with. So, minimize your main PSP program now and double click the PSP icon to open up paint shop pro again. It can be confusing having 2 of them open, so what I do is, in the second application of PSP, I open up a blank 200x200 image, just to remind me that, that application is not the main one I am using, but just the blank psp for the purpose of taking the screenshot.
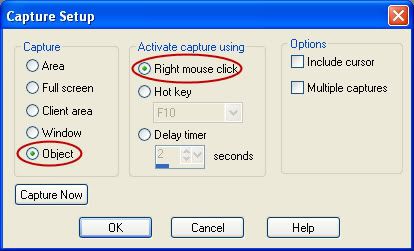
Now what we need to do is set up your screenshot settings. So, in the second PSP you have open, go up to the "File" menu, scroll down to "Import", then to "Screen Capture" and then to "Set Up". Put your settings to the picture below and click OK.
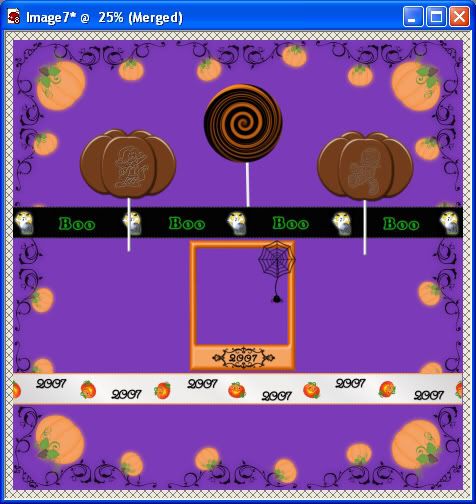
Don't minimize this PSP, just click on your main PSP application to unminimize it. At this point, we have 2 options. You need to decide if you want to take a screenshot of the entire window like in the first picture below, which includes the blue border, or of just your background image itself like the second pic.
First, we'll work with doing a screenshot with the blue border. Switch over to the second PSP you opened up. The one with the blank 200 x 200 image. Again, don't minimize either application of PSP or it won't work properly. Select your mover tool. We are doing this because when we click in our image, we don't want it to fill with colour or select pixels if you have some other tool already selected. Go up to the "File" menu, scroll down to "Import", then to "Screen Caputre", and then to "Set Up". Push the "Capture Now" button, and this application of PSP will automatically minimize and your main PSP screen will appear. RIGHT click inside the window on your background picture, then LEFT click on the blue border. Your screenshot will appear on your screen. Now all you do is save it.
This next part is if you do not want the blue border to appear on your picture.
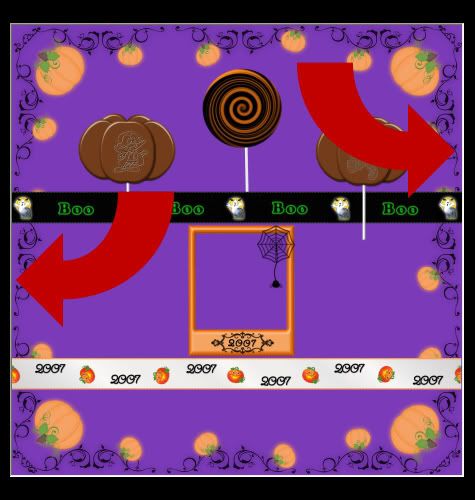
Switch over to your main PSP application again. On your image, pull the top, bottom and sides out slightly like in the picture below.
Switch over to your second blank application of PSP. Go up to the "File" menu, scroll down to "Import", then to "Screen Caputre", and then to "Set Up". Push the "Capture Now" button, and this application of PSP will automatically minimize and your main PSP screen will appear. RIGHT click inside the window on your background picture, then LEFT click again on the inside of your background image, not on the blue border. Select your crop tool and closely crop your image.
The reason we had to pull the top and bottom out is because when you do a screenshot inside the window without pulling out the top and bottom, it kind of leaves a funky border thingy around the edges like in the picture below.
There are other ways of doing screenshots, but this is the easiest for me. It takes a bit of practice to get used to how it all works, but once you have done it a few times, you won't need to keep looking at this tut to figure it out :)

tiffany and co jewelry,tiffany and co outlet,tiffany and co,tiffany's,tiffanys,tiffany co,tiffany jewelry, louis vuitton outlet online,louis vuitton,louis vuitton outlet,louisvuitton.com,authentic louis vuitton,louis vuitton factory outlet,cheap louis vuitton, oakley sunglasses,oakley vault,oakley sunglasses cheap,oakleys,oakley.com,sunglasses outlet,cheap oakley,cheap oakley sunglasses,oakley outlet,cheap sunglasses,oakley prescription glasses,fake oakleys,oakley sunglasses outlet,oakley glasses,oakley store,fake oakley,oakley sale,cheap oakleys,discount oakley sunglasses, polo ralph lauren outlet online,ralph lauren,polo ralph,polo ralph lauren,ralph lauren outlet,polo shirts,ralph lauren outlet online,polo ralph lauren outlet,ralphlauren.com,polo outlet,ralph lauren polo, uggs, ugg australia,ugg slippers,uggs boots,uggs outlet,ugg boots,ugg,uggs,ugg boots clearance,uggs on sale, michael kors outlet store,michael kors outlet,michael kors outlet online,michael kors,kors outlet,michael kors handbags,michael kors outlet online sale,michael kors handbags clearance,michael kors purses,michaelkors.com,michael kors bags,michael kors shoes,michaelkors,cheap michael kors, cheap oakley sunglasses, gucci outlet,gucci handbags,gucci belts,gucci shoes,gucci,gucci belt,gucci sunglasses,gucci bags,cheap gucci, kate spade outlet,kate spade,katespade,kate spade handbags, christian louboutin shoes,louboutin shoes,louboutin outlet,louboutin,christian louboutin,red bottom shoes,red bottoms,christian louboutin outlet,red bottom shoes for women,louboutins, uggs, ray ban sunglasses, louis vuitton outlet stores,louis vuitton outlet online,louis vuitton,louis vuitton outlet,louisvuitton.com,authentic louis vuitton,louis vuitton factory outlet,cheap louis vuitton, louboutin outlet,louboutin,christian louboutin,red bottom shoes,louboutin shoes,red bottoms,christian louboutin shoes,christian louboutin outlet,red bottom shoes for women,louboutins, michael kors outlet online,michael kors,kors outlet,michael kors outlet,michael kors handbags,michael kors outlet online sale,michael kors handbags clearance,michael kors purses,michaelkors.com,michael kors bags,michael kors shoes,michaelkors,cheap michael kors, michael kors handbags,michael kors outlet,michael kors outlet online,michael kors,kors outlet,michael kors outlet online sale,michael kors handbags clearance,michael kors purses,michaelkors.com,michael kors bags,michael kors shoes,michaelkors,cheap michael kors, louis vuitton outlet,louis vuitton outlet online,louis vuitton,louisvuitton.com,authentic louis vuitton,louis vuitton factory outlet,cheap louis vuitton