


Supplies needed for this tutorial: A copy of PSP, SuperBlade Pro is optional, SK Christmas 29 Shape, SK Bulb End font. The last 2 are in a zip file which you can get Here. Place the SK Christmas 29 shape into your "My Preset Shapes" folder or wherever you have your shapes stored.
1. Start by opening a 500 x 500 transparent image.
2. Click on your preset shapes tool, and select the shape SK Christmas 29.
3. Set your foreground and background colour to #C00000, create as vector is checked, anti alias is checked and a width of 1, and draw out your shape.
4. In your layer palette to the right, right click on vector 1 and choose "Convert to Raster Layer".
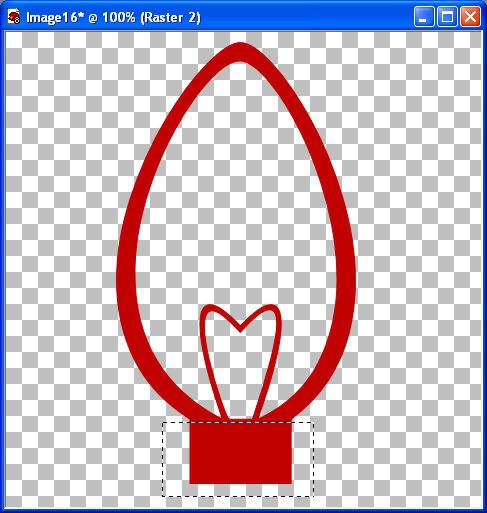
5. Next, we are going to get rid of the middle and bottom, square part of the bulb. Click on your "Selection Tool" to the left and change it to "Rectangle", and starting from the bottom going upwards, draw out a rectangle shape, stopping at the point that I have in the picture below.
6. Now hit your delete key and go up to the "Selections" tab and click on "Select None".
7. Click on your eraser tool, and erase the wire looking part in the middle, being carefull not to erase any of the sides of the bulb itself. Your image should look like the one below.

8. Click on your magic wand tool with these settings: Mode is Replace, Match Mode is RGB Value, Tolerance is 30, Feather is 0, Anti-alias is checked. Make sure your bulb layer is selected (it should be the one highlighted blue in the layer palette to the right) and click once in the middle of your bulb. You should have marching ants all around the inside of your bulb.
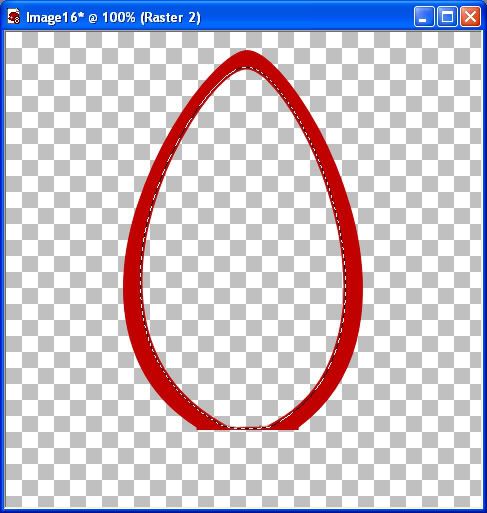
9. Next, go up to the "Selections" tab, choose "Modify", then choose "Expand", and set the number of pixels to 3. Your marching ants should have moved 3 pixels into the red area of your bulb like in the pic below.
10. Go up to the "Layers" tab and choose "New Raster Layer".
11. Click on your flood fill tool, and on the new raster layer, click once in the middle of your bulb to fill it with our red colour.
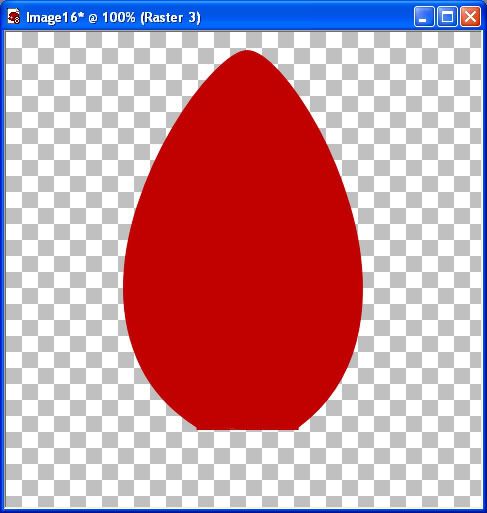
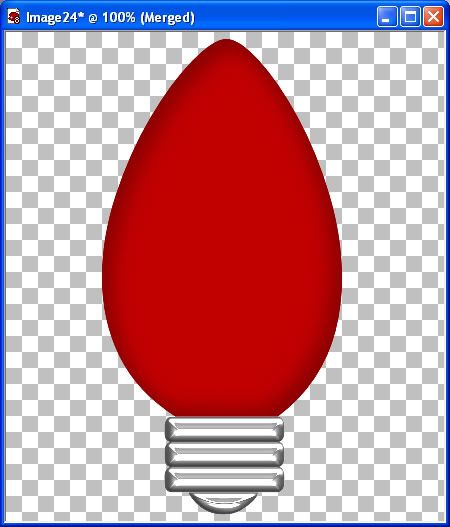
12. Go up to the "Selections" tab and choose "Select None". Your bulb should now be solid red as in the picture below.
13. In your layer palette to the right, right click on one of the layers and choose "Merge" and from the flyout choose "Merge Visable".
14. Go up to the "Selections" tab and choose "Select All", back up to the "Selections" tab and choose "Float".
15. Go up to the "Layers" tab and choose "New Raster Layer".
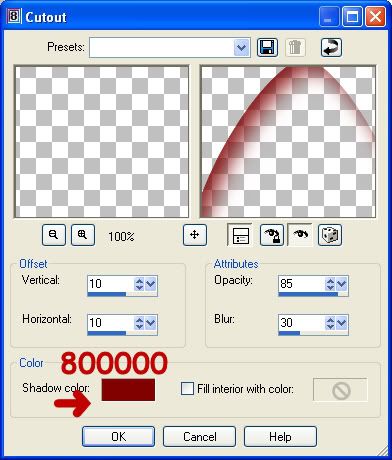
16. Go up to the "Effects" tab and choose "3D Effects" then choose "Cut Out" and change it to the settings below.
17. Go up to the "Layers" tab and choose "New Raster Layer".
18. Go to the "Effects" tab and choose "3D Effects" then choose "Cut Out" and keep the settings the same except change the vertical and horozontal from 10 to -10 each, and click OK.
19. Go up to the "Selections" tab and choose "Select None".
20. In the layers palette, right click on one of your layers and choose "Merge" then "Merge Visable".
This next part requires SuperBlade Pro. If you don't have it, you can just use a silver gradient and give it a bevel from the 3D Effects tab in PSP.
21. Change your foreground and background to white.
22. Double click on the SK Bulb End Font from the zip file and minimize it. Select the "Text" tool, and find "SK Bulb End" in the list of fonts. Change to these settings: Create as vector checked, Size is 200 (may vary depending on what size bulb you made), Stroke width is 1, Anti alias is checked.
23. Type out a capitol A onto your bulb layer, and right click "Vector 1" in your layers palette and change it to a raster layer.
24. Go up to the "Selections" tab and choose "Select All", back up to the "Selections" tab and choose "Float", and back up to the "Selections" tab and choose "Defloat".
25. Next, go to the "Effects" tab, choose "Plug ins", then to "Flaming Pear/Super Blade Pro". I have used a preset called JLSilver, but cannot remember where I got this. (If it is yours, or you know where this came from, let me know and I will give you credit, and post the link to it here.) Use one of your choosing that you think looks good, playing with the different bevel settings.
26. Go up to the "Selections" tab and choose "Select None".
I thought it would look better without the spaces between each bar, so what I did was selected each bar with my rectangle tool, and copied and pasted each as a new layer, moved them together and then merged those layers together.
At this point, you are pretty much done. All that is left to do is to merge all visable layers and you've got yourself a Christmas bulb.
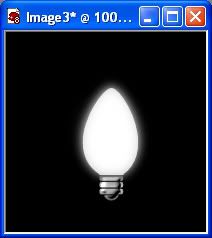
TIP: If you would like to give your blubs a little glow, after merging your layers in step 13, hold down your shift key and hit the D key to duplicate that layer. Go up to the "Adjust" tab, choose "Blur" then choose "Gaussian Blur" and set the radius number to somewhere between 4 and 8. Copy and paste that onto your bulb layer, placing it behind your solid red bulb.
TOU:
If you do this tutorial, your end result is yours to do whatever you wish; give it away as a freebie, use it as part of a kit, or sell it for profit. You may not make this into an action or script to give away as a freebie or to sell for a profit. A mention or a link back here would be appreciated but is not mandatory. Please do not share the supplies or tut through email or any other means, send them here to my blog to get the supplies and tut for themselves.


This is a great tut thanks