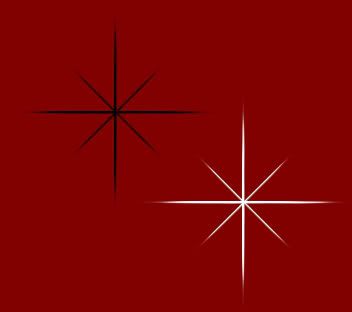
Making the Brush:
1. Open up a 400 x 400 transparent image.
2. Set your forground and background to black.
3. Select your Preset Shapes tool, and choose Rounded Rectangle.
4. Draw out your rectangle in the middle of the page.
5. In the layer palette to the right, right click on Vector 1 and choose Convert to Raster Layer.
6. Go up to the Effects tab, then to Geometric Effects, then to Perspective Horozontal. Use the settings in the picture below.
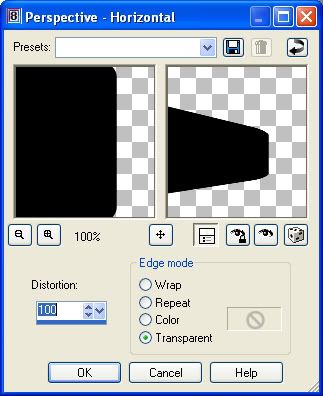
7. Now we need to do the same to the opposite side, so go up to the Image tab, and choose Mirror.
8. Go to the Effects tab, Geometric Effects, Perspective Horozontal, use same settings.
9. Mirror the image.
10. Go to the Effects tab, Geometric Effects, Perspective Horozontal, use same settings.
11. Mirror the image.
12. Go to the Effects tab, Geometric Effects, Perspective Horozontal, use same settings.
13. Mirror the image.
14. Go to the Effects tab, Geometric Effects, Perspective Horozontal, use same settings.
15. Mirror the image.
16. Go to the Effects tab, Geometric Effects, Perspective Horozontal, use same settings.
Phew, finished that part.
17. Now, we need the ends to be a little bit narrower and a bit more transparent. So, go up to the Effects tab and choose Distortion Effects, then Wind. Use these settings.
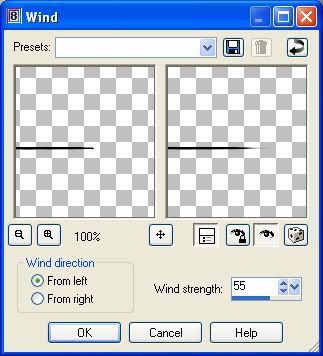
18. Mirror the image and go to the Effects tab, choose Distortion Effects, then Wind and use the same setttings.
You should end up with something like the below picture. If your's is fatter, then you may have missed doing one of the perspective horozontal steps.
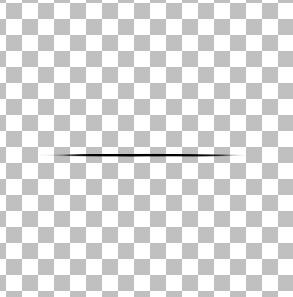
Hold down your shift key and hit the D key to duplicate our canvas for later use. You can minimize it for now.
We need to put this first horozontal line in the middle of our canvas, so...
19. Go up to the Edit tab, choose Cut, then back up to the Edit tab, and choose Paste as New Layer.
20. Now we need a vertical line to overlap that one. Go up to the Edit tab, this time choose Copy, then back up to the Edit tab, and choose Paste as New Layer.
You won't see much of a difference on your canvas because both these line are in the exact same place. We need to rotate the second line into a vertical postion.
21. Go up to the Image tab, choose Rotate, then choose Free Rotate. Use the settings in the picture below.
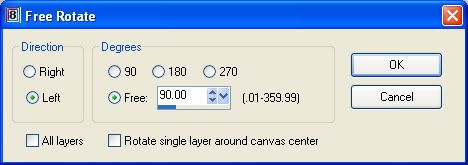
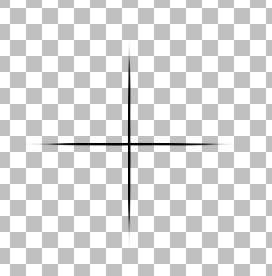
You should now have what looks like a cross on your canvas.
Unminimize our duplicated canvas. The lines that criss cross the star are usually shorter in length so we need to resize this just a bit smaller.
22. Go up to the Image tab, choose resize and use the setting in the picture below.
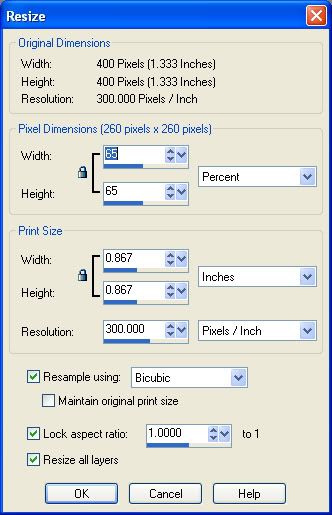
Now we want to copy and paste that onto our Cross layer...
23. Make sure the smaller resized layer is your active layer and then go up to the Edit tab, choose Copy.
24. Click on your Cross canvas to make this one the active canvas, then go back up to the Edit tab, choose Paste as New Layer.
Again, you won't see a difference on your image because it is in the same spot as the longer horozontal line.
25. Go up to the Image tab, choose Rotate, then choose Free Rotate. Use the settings below.
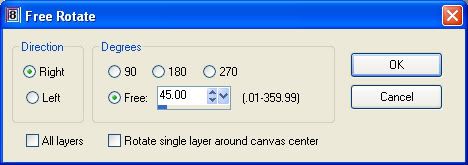
26. Go up to the Edit tab again, and choose Paste as New Layer. The final smaller line is now on your canvas in the horozontal position.
27. Go up to the Image tab, choose Rotate, then choose Free Rotate. Use the same settings, but put the green dot beside the word LEFT this time. You should have what looks like this:
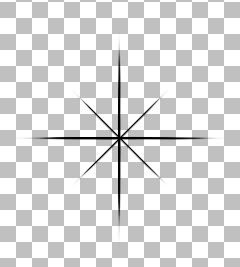
At this point, if you want to make a white tube out of this, hold down your shift key and hit the D key to duplicate this image. Minimize it for a bit later.
You can leave this brush as it is, to use as a main template for your sparkle brushes, and then you can click on your airbrush tool, and choose a soft round brush and plop a dot in the center. To finish off the brush, in the layer palette to the right, right click on one of the layers and choose Merge Visable. Then go to the File menu, go to Export, then to Custom Brush. Give it a name and click on OK and you're done.
Turning This Brush Into a Tube:
I've used a red background just so you can see the white star better.
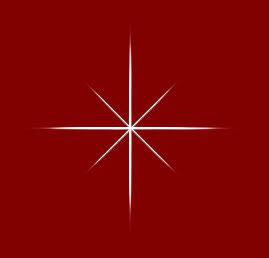
If you haven't already, merge visable all layers. Go up to the Adjust tab, at the bottom choose Negative Image. Your black brush has now turned into a white image which you can save as a template and decorate as many sparkles as you want. Then to tube it, crop off the extra space all around, go to the File menu, choose Export, then choose Picture Tube, give it a name and your done :)


20150728 junda
coach outlet
ed hardy clothing uk
coach outlet online
ralph lauren uk outlet
gucci sito ufficiale
true religion
kate spade bags
michael kors handbags
christian louboutin shoes
fitflops sale
coach outlet store online
coach outlet store online
air max uk
louis vuitton sacs
kate spade outlet
coach factory outlet
louboutin pas cher
michael kors
pandora charms
nike air force 1
kate spade handbags
ray ban wayfarer
true religion jeans outlet
ed hardy clothing outlet
chanel online shop
ray ban sunglasses
hollister outlet
michael kors outlet
michael kors purse
mcm backpack
gucci handbags
michael kors handbags
louboutin
burberry scarf
oakley sunglasses outlet
tn pas cher
michael kors outlet
pandora charms
ray bans
air jordan uk