


Supplies:
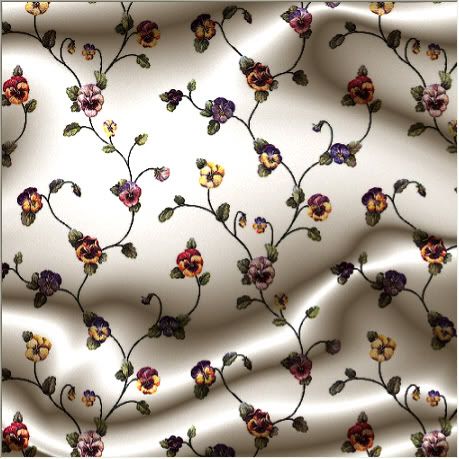
SK Floral Swatch which you can download HERE
1. Open up a new transparent image to whatever size you want your background paper to be.
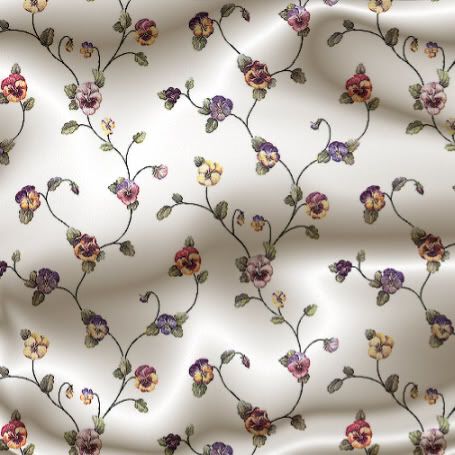
2. Set your foreground colour to white and your background colour to #918573.
3. Click on your background properties box and then click on the Gradient tab at the top.
4. From the list of gradients, choose the one called foreground-background, Style is linear, and Repeats to 8, Angle is up to you, but I have mine set to 166.
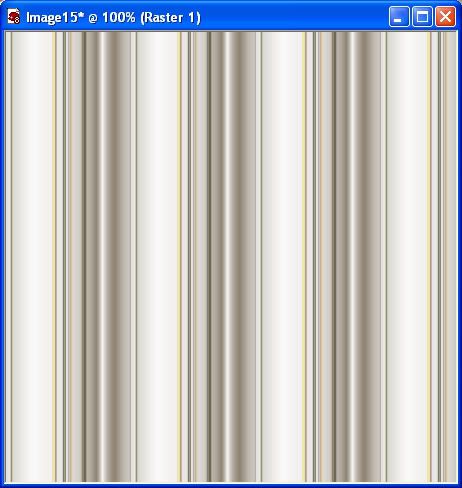
5. Click on the flood fill tool on the left and fill your canvas with your gradient. Your canvas should now look like this:
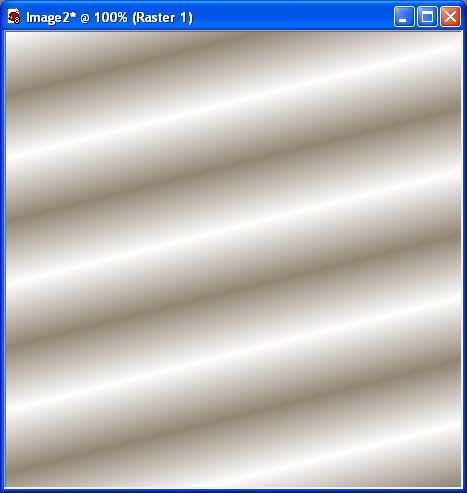
6. Click on your Mesh Warp tool on the left and set the Horozontal and Vertical at 3, Symmetric and Show Mesh are both checked, Edge Mode is background, Draft Quality is High, and Best Quality is checked.
*Note that the nodes that are all around the top, bottom, and sides can't be moved inward or outward.
7. Put your cursor on one of the square nodes not around the outside of your canvas and pull up, down, or to the side slightly, and watch your canvas change. Do this a few more times with a few more nodes to smoosh it around a bit on the page.
* Hold down your Ctrl or Shift key while moving a node to shift the placement of the node on the canvas. This is what I have so far:
8. When you've done that a few times, up top, to the left of your Mesh Horozontal settings, you will see a blue checkmark. Click that to accept the changes made on your canvas. If you don't like what it turned out to be and want to start over, click the red x and redo it. Don't worry too much how it looks, because this is just the first step, we aren't done smooshing it around.
9. Now, click on your Warp Brush from the palette on the left. Warp Mode is Push, Size about 500, Hardness 0, Strength is 67.
* You can play around with these settings once you get the feel of what we are doing here.
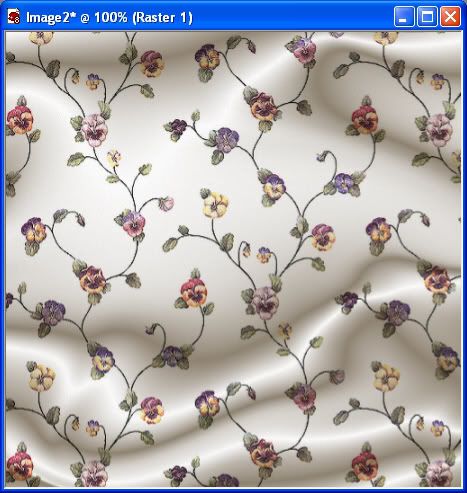
10. Open up the SK Floral Swatch from the zip file and set it as your foreground pattern.
11. Go up to the Layers tab and create a New Raster Layer.
12. Flood fill your blank layer with the floral pattern.
13. In the layers palette on the right, change the Blend Mode of the floral pattern layer to Multiply.

This is what mine looks like now:

14. In the layers palette, click on your gradient filled layer to make it active.
* You may want to duplicate your image here just incase you warp it way too much and don't like it. You can then just use the original to start over.
15. Click on your Warp Brush agian, same settings and start warping your image around slightly to see the changes. Make sure you are NOT on the floral layer or your pattern will get distorted.
* Don't forget to click the blue checkmark at the top every once in a while to accept your changes on your canvas, because if you don't and you click the undo button or the red x, you will loose whatever changes you"ve made to your canvas.
I'm working with a 450 x 450 image in order to get these screenshots to fit on my page, so I just smooshed my image around a little bit, but this is my result.
16. When you're satisfied with what it looks like Merge Visable your 2 layers.
* The floral patterned swatch we used is a pretty light colour and the background colour we used to fill the warped layer wasn't very dark either. If you were to use a darker patterned swatch, you would have to make the background colour to fill the warped layer a lot darker so it will show through on your pattern layer.
* Play around and see what you can come up with.
* add a faint texture
* apply a filter
* duplicate the image, change that blend mode to muliply, merge layers, and change the brightness/contrast to get a darker version like in the picture below:
Use my Striped and Geometrical Papers Tutorial to make matching papers.
TOU:
If you do this tutorial, your end result is yours to do whatever you wish; give it away as a freebie, use it as part of a kit, or sell it for profit. A mention or a link back here would be appreciated but is not mandatory. Please do not share the supplies or tut through email or any other means, send them here to my blog to get the supplies and tut for themselves.


Awesome tutorial, thanks Shawna!
Suzie